

Introduction: What Are Hopper Windows?
Are you looking for a quick guide on Hopper window installation? Here are the essential steps:
- Measure Accurately: Ensure your new window is slightly smaller (about 1/4″ less in width and height) than the prepared opening.
- Prepare the Opening: Clean it thoroughly and check for structural soundness.
- Position the Window: Place it into the opening, ensuring weep holes face outside and cam locks are inside/top.
- Shim and Level: Use shims (no more than 1/4″ per side) to make sure the window is plumb, level, and square.
- Secure the Frame: Fasten the window using screws through the side installation channels.
- Seal All Gaps: Apply approved caulk and low-expanding foam around the interior and exterior of the frame.
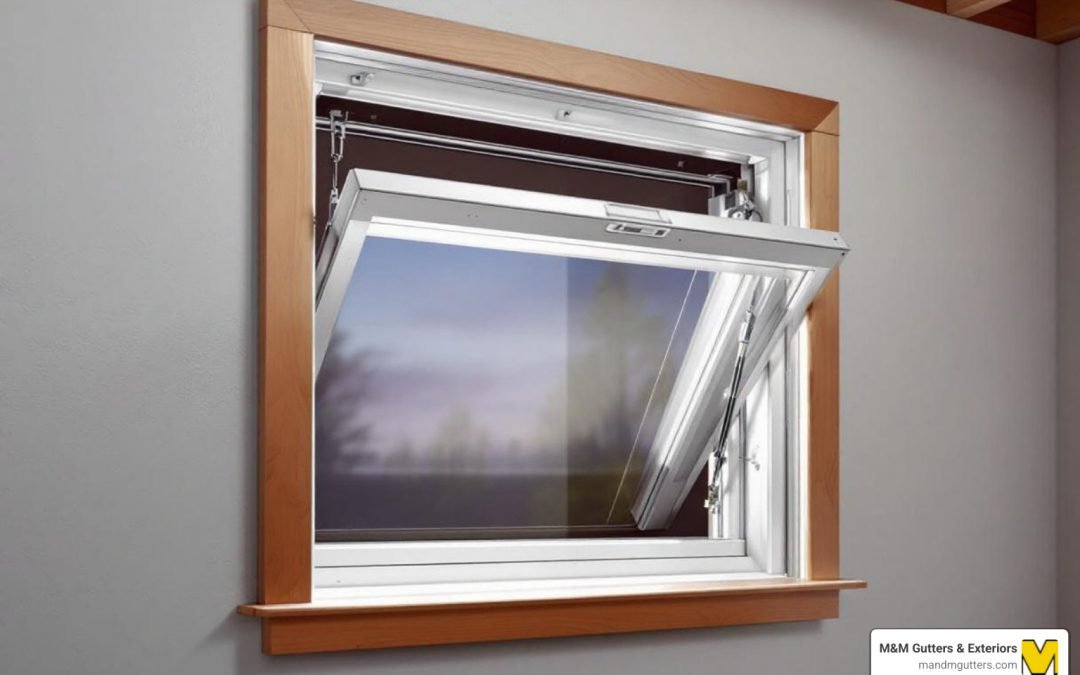
Hopper windows are a fantastic choice for basements and other compact spaces. They open inward from the top, hinged at the bottom. This unique design lets fresh air in while keeping debris out, making them perfect for basements, bathrooms, and laundry rooms. They bring in natural light and offer great ventilation, tackling humidity where it often builds up.
I’m Nathan Nuttall at M&M Gutters & Exteriors. With over 30 years serving Utah homeowners, our team delivers expert craftsmanship in exterior home improvements, including specialized Hopper window installation.

Why Choose Hopper Windows for Your Home?
When considering a new window for your basement, bathroom, or even a garage, hopper windows often emerge as a top contender. But what makes them so special, and how do they stack up against other popular basement window types? Let’s dive in.
The primary benefits of installing hopper windows are numerous, especially for areas like basements that often struggle with ventilation and natural light. Their unique inward-opening design, hinged at the bottom, allows for controlled airflow. This means you can get fresh air without worrying about leaves, debris, or unexpected critters finding their way in. Furthermore, since they typically sit higher on basement walls, they allow hot, humid air to escape, while cooler, fresh air can enter, making them excellent for humidity reduction. This is particularly beneficial in humid environments, which basements in Utah can certainly experience.
Hopper windows are also champions of natural light. Often installed in smaller, higher openings, they can transform a dim, dreary basement into a brighter, more inviting space. This influx of natural light isn’t just about aesthetics; it can also lead to energy savings by reducing the need for artificial lighting during the day.
Hopper Windows vs. Other Basement Window Types
To truly appreciate hopper windows, it’s helpful to see how they compare to their cousins: awning and egress windows.
| Feature | Hopper Windows | Awning Windows | Egress Windows |
|---|---|---|---|
| Opening Style | Hinged at bottom, opens inward from the top | Hinged at top, opens outward from the bottom | Varies (casement, slider, or double-hung) but must meet specific size requirements for emergency exit |
| Primary Use | Basements, bathrooms, small spaces, ventilation | Basements, above-grade, ventilation (rain protection) | Basements with finished living/sleeping spaces |
| Ventilation | Excellent, allows rising hot air to escape | Good, can be left open in light rain | Varies by type, but primary function is emergency exit |
| Security | High (small, internal locks) | Good (opens outward, small opening) | Varies (must be operable from inside without special tools) |
| Egress Compliant? | Can be, if sash is removable and meets size codes | Rarely (small opening) | Yes, specifically designed to meet codes |
| Cleaning | Easy (both sides accessible from inside) | Easy (both sides accessible from inside) | Varies by type |
Ventilation and Humidity Reduction: Hopper windows are exceptional for venting damp areas. Their inward tilt allows hot, humid air, which naturally rises, to escape from the basement, letting in cooler, drier air. This is a significant advantage over other types, especially in basements prone to dampness.
Natural Light: While many basement windows bring in light, hopper windows, often placed higher on the wall, maximize light penetration into the space, contributing to better sleep patterns, improved alertness, and even a lower risk of seasonal depression.
Energy Efficiency: Modern Hopper window installation can significantly boost your home’s energy efficiency. They create an airtight seal when closed, preventing drafts. Many come with double-pane, low-E (low-emissivity) glass, which helps keep cold air out in winter and warm air out in summer, reducing your energy bills. Features like multi-chamber vinyl frames and advanced spacer technology in double-pane glass further improve insulation, offering superior thermal performance.
Security Features: Despite their small size, hopper windows are quite secure. They typically lock from the inside, making them difficult for intruders to manipulate from the exterior. Their small opening also presents a challenge for entry, acting as a deterrent. Some manufacturers even reinforce hinge points with steel bars for added security and durability.
Customization Options: Just because they’re practical doesn’t mean they can’t be stylish! Hopper windows offer various customization options. You can choose from different glass types (e.g., clear, obscure, safety glass), frame colors (interior and exterior), hardware finishes, and even decorative grids (contour, flat, pencil, or SDL). This allows us to tailor your new windows to complement your home’s aesthetic.
Exploring different window styles for your home can be exciting, and you can learn more about them here: More on different window styles. For homeowners in Salt Lake City and throughout Utah, choosing the right windows also means considering our unique climate: Choosing windows for Utah’s climate.
Preparing for Your Hopper Window Installation
A successful Hopper window installation begins long before the first screw is driven. Proper preparation ensures a smooth process, a perfect fit, and long-lasting performance.

Opening Preparation
First, we thoroughly inspect the existing window opening. This includes checking for any structural decay or damage in the surrounding wall, especially in older homes. Any rot or compromised framing must be repaired before the new window goes in. We’ll clear the opening of any debris, old caulk, or insulation. The sill plate needs to be level; if it’s not, we’ll shim it as necessary to create a perfectly flat base for your new window. For rough openings, we’ll ensure they are clean and free of obstructions. We also check for overall squareness by measuring diagonally, ensuring the opening is within an 1/8-inch tolerance.
Structural Integrity Check
The window’s strength largely comes from the surrounding wall structure. We’ll make sure the existing frame, wall, and weather-resistant barrier are adequate and structurally sound. If necessary, we’ll construct a new wood frame to properly support the window.
Lead Paint Awareness
For homes built before 1978, lead-based paint is a potential concern. We are aware of the U.S. EPA’s Lead-Based Paint Renovation, Repair, and Painting Program (RRP Rule) and take necessary precautions to safely manage any lead paint encountered during the removal of old windows. Your safety, and ours, is always a top priority.
Safety Precautions
Safety is paramount during any installation project. Our team always wears safety glasses and work gloves. We use safe lifting techniques, especially when handling larger windows, and ensure adequate personnel are on hand. We place tools and parts on a drop cloth to keep the work area clean and prevent hazards. If working at liftd heights, we follow all ladder and scaffolding safety instructions. We also ensure that no window opening is left unattended, especially if children are present, to prevent accidents.
How to Measure for a Replacement Hopper Window
Accurate measurement is perhaps the most critical step in ensuring a successful Hopper window installation. A window that’s too big won’t fit, and one that’s too small will be difficult to seal effectively, leading to energy loss and potential water intrusion.
To measure for a replacement hopper window accurately, we focus on the existing opening after the old sash and any interior trim have been removed.
- Measure Width: We take three width measurements: at the top, middle, and bottom of the opening, from jamb to jamb. The smallest of these three measurements is the one we use.
- Measure Height: Similarly, we take three height measurements: at the left, center, and right of the opening, from the sill to the header. Again, the smallest of these three is our critical measurement.
A good rule of thumb is that the replacement window should be approximately 1/4″ less in both width and height than the existing window opening. This slight reduction allows for shimming and insulation, ensuring a snug but not forced fit. For windows going into existing concrete walls, we’ll measure from wooden sill to wooden sill after the old window is out.
For a more comprehensive guide on measuring any replacement window, you can refer to our detailed resource: A guide to measuring windows.
Essential Tools and Materials for Hopper Window Installation
Having the right tools and materials on hand makes all the difference in a smooth and efficient Hopper window installation. Here’s what we typically gather for the job:
- Safety Gear: Safety glasses and work gloves are non-negotiable for protecting our team.
- Measuring and Marking: A reliable tape measure, pencil, and a carpenter’s square for precision.
- Leveling and Alignment: A long level (at least 2-3 feet) to ensure the window is perfectly plumb and level.
- Cutting and Trimming: A utility knife for cutting caulk, foam, and shims, and a putty knife for scraping.
- Drilling and Fastening: A powerful drill with appropriate drill bits (including a 1/8″ pilot bit) and a driver for screws.
- Fasteners: Pan head or round head wood screws, suitable for the frame and the type of material we’re fastening into (e.g., concrete anchors if applicable). We countersink holes so the top of the fastener doesn’t interfere with window operation.
- Shims: Plenty of composite or wood shims to ensure proper alignment and support. We prefer stacked shims, contrasting and plane to plane, rather than single wedge shims.
- Sealing: A caulking gun, high-quality silicone caulk (we look for ASTM C920, Class 25 compliant products for durability and adhesion), and AAMA approved low-expanding foam insulation (ASTM C1620 compliant).
- Protection: A large drop cloth to protect your floors and catch any debris.
- Hammer/Mallet: For gently tapping shims into place or adjusting components.
With these tools and materials, we’re well-equipped to tackle your Hopper window installation with confidence and precision.
Your Step-by-Step Hopper Window Installation Guide
Once the measurements are taken and the materials are ready, the real work of Hopper window installation begins. We approach each step with meticulous care to ensure a flawless result.

Step 1: Remove the Old Window and Prepare the Opening
This initial phase is crucial, especially when replacing an old hopper window, which is common in older homes throughout Utah.
- Careful Removal of Old Window: We start by carefully removing the old window sash and frame. This might involve cutting through old caulk, removing screws, or even dismantling parts of an older, often wood-framed, window unit. For homes built in the 1940s or earlier, we often encounter wood framing within concrete openings, which requires careful extraction.
- Cleaning Debris: After the old window is out, we thoroughly clean the opening. This means removing all loose debris, dust, old insulation, and any remaining caulk or mortar. A clean surface is essential for proper adhesion of new sealants.
- Inspecting the Frame: We then carefully inspect the existing rough opening for any signs of structural damage, rot, or decay. If we find any issues, we repair them before proceeding. This might involve replacing sections of wood framing or addressing any compromised concrete. We want to ensure a solid, stable foundation for your new window.
- Checking for Level Sill: The sill (the bottom of the window opening) must be perfectly level. We use our level to check this, shimming as necessary to correct any slopes or irregularities. An unlevel sill can lead to operational issues and compromise the window’s seal.
- Adding a Blind Stop (if applicable): For some installations, especially when replacing older windows, we may add a “blind stop.” This is typically a piece of 3/4″ quarter-round or similar wood, installed around the top and sides of the wood frame. It creates a surface for the new window to seat securely against, enhancing the seal and overall stability. We secure it with finish nails.
Sometimes, homeowners wonder if it’s time for a full window replacement rather than just a repair. You can find more information on the signs that indicate a need for new windows here: When to consider a full replacement.
Step 2: Shimming and Securing the New Window
With the opening perfectly prepped, it’s time to introduce your new hopper window.
- Placing the Window: We carefully lift the new hopper window and place it into the prepared opening. We ensure that the cam lock mechanism is positioned to the INSIDE and to the TOP, as this is how hopper windows are designed to operate. Crucially, we also confirm that the weep holes—small drainage channels that prevent water buildup—are on the bottom and facing outside.
- Centering and Dry-Fitting: We dry-fit the window first, centering it within the opening. This allows us to assess the margins (the gaps between the window frame and the rough opening) and ensure they are consistent all around.
- Shimming Techniques: This is where precision really counts. We use shims to ensure the window is perfectly plumb (vertically straight), level (horizontally straight), and square. We place shims behind each installation hole in the frame, typically 4 to 6 inches from the top and bottom of the unit. The shim spaces should be no more than 1/4 inch per side. We use stacked shims, contrasting and plane to plane, to provide solid support. It’s vital not to place shims at the header and sill locations of the jamb sides, as this can distort the window frame. If the spacing between shims is greater than 12 inches, we’ll add additional shims to maintain margins and stabilize the frame.
- Fastening the Frame: Once the window is perfectly aligned and supported by shims, we secure it. We drill 1/8″ pilot holes through the pre-drilled holes in the window frame (or drill new holes 4-6 inches from each corner if none exist). We then fasten the window using appropriate screws through the side wall installation channels. It’s critical not to screw through the top header or bottom sill, as this can distort the window and its operation. We also avoid over-tightening screws, which can pull the frame out of square or warp it. If the spacing between jamb screws is greater than 24 inches, additional jamb screws may be needed to stabilize the frame. We countersink all holes so the screw heads don’t interfere with the window’s function.
For a visual guide and more detailed manufacturer-specific instructions, resources like Hopper Windows Installation Instructions can be very helpful.
Step 3: Achieving a Perfect Seal in Your Hopper Window Installation
The final step in a quality Hopper window installation is achieving a perfect, weather-tight seal. This is essential for energy efficiency, preventing water intrusion, and ensuring the longevity of your window.
- Low-Expanding Foam Insulation: Once the window is secured and aligned, we fill the cavities between the window frame and the rough opening with AAMA approved low-expanding foam insulation (compliant with ASTM C1620). This foam creates an excellent thermal barrier, further boosting energy efficiency and reducing drafts. It’s crucial not to overfill with foam, as this can cause the jambs to bow, affecting the window’s operation and performance. Similarly, if using a backer rod before caulking, we ensure it’s not overpacked.
- Interior Caulking: On the interior side, we apply a neat bead of high-quality silicone caulk (compliant with ASTM C920, Class 25) around the perimeter where the window frame meets the wall. This creates an airtight seal and provides a finished look before any interior trim is installed.
- Exterior Caulking: The exterior seal is arguably the most critical for weatherproofing. We apply a continuous bead of the same high-quality silicone caulk along the entire perimeter of the window frame where it meets your home’s exterior siding or masonry. This prevents water penetration and protects against air leaks. We also ensure that the sealant is applied to the inside edge of any blind stops and the bottom of the wood frame if they were installed.
- Weatherproofing: Beyond caulk and foam, we ensure that the weep holes are clear and unobstructed. These small openings are vital for draining any moisture that might accumulate within the window’s frame to the exterior, preventing water damage. We also consider any flashing or weather-resistant barriers that might be integrated with your home’s exterior to ensure a seamless weatherproofing envelope.
By carefully sealing and insulating your new hopper window, we ensure it performs optimally, keeping your Salt Lake City home comfortable and dry for years to come. For specific details on installing basement hopper and sliding windows, a comprehensive guide like the Ply Gem Installation Guide offers valuable insights.
Advanced Considerations and Maintenance
After the physical Hopper window installation is complete, our job isn’t quite finished. We perform a thorough post-installation check to ensure everything is perfect. This includes testing the window’s operation, ensuring it opens and closes smoothly, and that the cam locks engage securely. We’ll also check for any visible gaps in the sealing and make immediate adjustments if needed.
Common Challenges and How to Avoid Them
Even with the best intentions, certain pitfalls can arise during Hopper window installation. Being aware of these common challenges helps us prevent them:
- Bowed Jambs: This is a frequent issue caused by overfilling with low-expanding foam insulation or overpacking backer rod. The expanding foam can exert enough pressure to push the window frame inward, affecting its operation. We avoid this by using the correct amount of low-expanding foam and never overpacking.
- Over-tightening Screws: Screws that are driven in too tightly can pull the window frame out of square, distort its shape, or even crack the vinyl. We use a controlled hand or power driver setting to secure the window firmly without over-stressing the frame.
- Over-packing Insulation: Similar to overfilling with foam, over-packing batt insulation can also lead to bowed jambs. We ensure insulation is placed snugly but not compressed.
- Sealing Weep Holes: Accidentally sealing the weep holes during caulking is a critical mistake. Weep holes are designed to allow moisture to escape the window frame. If blocked, water can accumulate, leading to damage, mold, and seal failure. We always double-check that weep holes are clear, facing the exterior, and located at the bottom of the window.
- Racked Frames: A “racked” frame means the window isn’t perfectly square, often due to improper shimming or an un-square rough opening. We avoid this by carefully checking for plumb, level, and square at multiple stages of the installation and continuously monitoring frame-to-opening margins.
- Troubleshooting Leaks: If a window leaks after installation, it’s usually due to an improper seal or obstructed weep holes. We ensure all caulk lines are continuous and properly adhered, and that weep holes are clear.
Building Codes and Egress Requirements
Building codes are crucial, especially for basement windows in finished basements or living quarters in Salt Lake City and throughout Utah. While hopper windows are excellent for ventilation and light, they have specific considerations regarding egress.
- Egress Window Codes: An egress window is an emergency exit required in finished basements or any room designated as a sleeping or living quarter. These windows must meet strict minimum size requirements for clear opening width, clear opening height, and clear opening area, and must be operable from the inside without special tools.
- Finished Basements and Living Quarters: Typically, standard hopper windows, due to their smaller size and inward-opening mechanism, do not meet egress requirements. Therefore, they should generally not be used as the sole emergency exit in finished basements or living quarters.
- Hopper Windows as Egress? In some specific cases, a hopper window might be suitable as an egress window if it is specifically designed to allow the sash to be completely removed in an emergency, and the resulting clear opening meets all local building code requirements for size. However, this is rare for typical hopper designs. For most basement egress needs, we recommend other window types like casement or slider windows that are specifically designed to meet these codes.
- Local Code Compliance: We always ensure that any window installation complies with all applicable local building codes in Salt Lake County, Utah County, Summit County, Tooele County, Davis County, Weber County, and Northern Utah. This is not just about safety, but also about protecting your home’s value and avoiding potential issues during inspections.
Post-Installation: Maintenance and Care
Once your Hopper window installation is complete, a little routine maintenance goes a long way in ensuring its longevity and performance.
- Regular Cleaning: We recommend cleaning the glass with a liquid glass cleaner and the exterior frame, sash, and screens with a mild detergent and water. For hopper windows, their inward-opening design makes cleaning both sides of the glass from inside the home remarkably easy.
- Hardware Lubrication: Periodically, check and lubricate any moving hardware components with a silicone-based lubricant to ensure smooth operation.
- Inspecting Weatherstripping: Over time, weatherstripping can wear out. Regularly inspect it for cracks, tears, or compression. If damaged, it may need to be replaced to maintain an airtight seal.
- Checking Caulk Seals: The caulk around your window is your primary defense against water and air leaks. Inspect it annually for any cracks, peeling, or signs of deterioration. If you notice any issues, reapply caulk according to the sealant manufacturer’s recommendations.
- Frame Cleaning: Vinyl frames are low-maintenance, but a gentle wipe-down with soap and water will keep them looking new. Avoid abrasive cleaners or solvents that could damage the vinyl.
By following these simple maintenance steps, your hopper windows will continue to provide excellent ventilation, light, and energy efficiency for many years to come.
Conclusion: Enjoy Your Brighter, Better-Ventilated Space
You’ve now got a comprehensive overview of Hopper window installation, from understanding their unique benefits to the detailed steps involved and crucial post-installation care. Whether you’re looking to banish basement humidity, flood a dim space with natural light, or simply improve your home’s energy efficiency, hopper windows offer a brilliant solution. The satisfaction of a well-executed DIY project is immense, especially when it results in a brighter, better-ventilated space.
However, we understand that not everyone has the time, tools, or inclination for a complex Hopper window installation. For complex jobs or if you prefer a professional touch in the Salt Lake City area, the experienced team at M&M Gutters & Exteriors ensures a perfect fit and finish for all your window projects. Our expertise, backed by over 30 years of serving Utah homeowners, means you can rest easy knowing your windows are installed to the highest standards, enhancing your home’s comfort, efficiency, and curb appeal.