

Why Replacing Rotted Eaves Before They Spread Saves Your Home
Replacing rotted eaves is something most Utah homeowners will face at some point — and the sooner you act, the less damage you’ll deal with.
Here’s a quick overview of the process:
- Inspect the eaves with a screwdriver to find soft or spongy wood
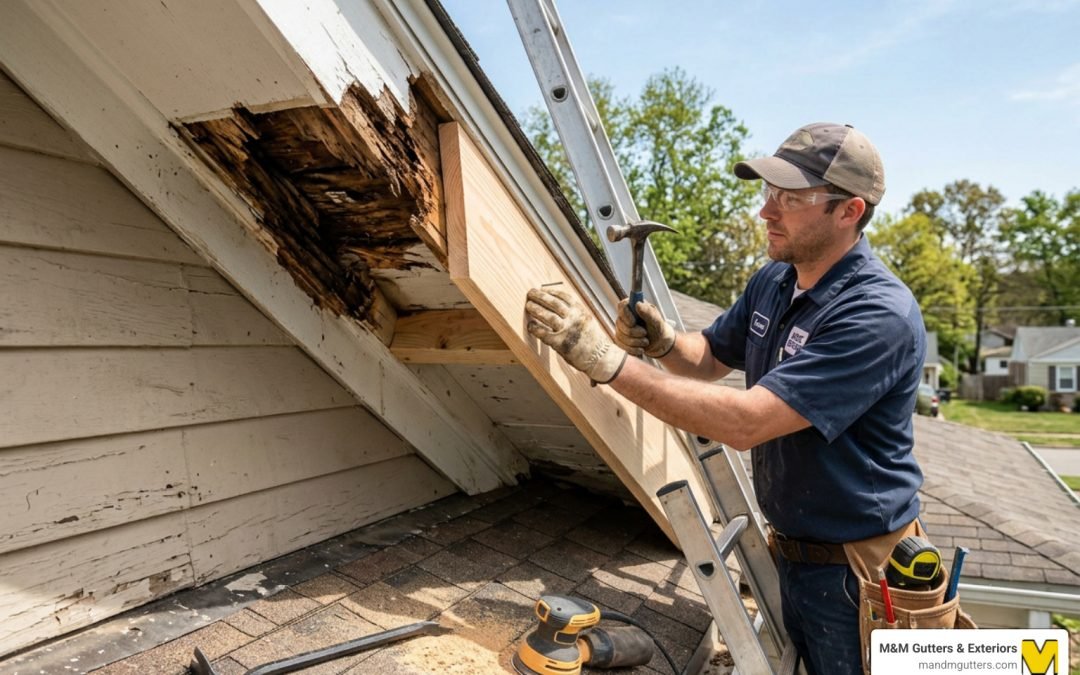
- Remove damaged gutters, fascia, soffit, and rafter tails
- Replace rotted components with pressure-treated lumber or PVC
- Seal and paint all new materials to block moisture
- Reinstall gutters and check attic ventilation
Rotted eaves don’t just look bad. They let water soak into your walls, attract pests, and quietly eat away at your roof structure. Left alone, what starts as a small soft spot in a fascia board can turn into a major structural repair in a matter of months.
The most common cause? Clogged gutters. When gutters back up, water overflows and sits against the wood trim of your roof edge — and wood soaking in standing water will rot. Every time.
The good news is that catching it early makes this a very manageable repair, whether you take the DIY route or call in a pro.
I’m Nathan Nuttall from M&M Gutters & Exteriors, and after more than 30 years serving Utah homeowners, I’ve seen every stage of eave rot — from a single soft board to full rafter replacement. In this guide, I’ll walk you through everything you need to know about replacing rotted eaves the right way, so the problem doesn’t come back.

Understanding the Anatomy and Causes of Eave Damage
To win the war against rot, we first need to understand the battlefield. The “eave” isn’t just one board; it is an entire system designed to keep water away from your home’s skeleton. In Northern Utah, where we deal with heavy snow loads and spring runoff, these components work overtime.
- Fascia Boards: These are the vertical finished boards you see running along the roofline. They are the “face” of your eaves and the primary mounting point for your gutters.
- Soffit Vents: The soffit is the horizontal span underneath the eave. It covers the underside of the rafters and often contains vents that allow your attic to breathe.
- Rafter Tails: These are the ends of the structural beams that support your roof. If rot travels past the fascia and into these tails, you’re looking at a structural repair rather than just a cosmetic one.
- Drip Edge: This is a metal flashing installed under the first layer of shingles. Its job is to direct water into the gutter and prevent it from wicking backward into the fascia wood.
What causes these parts to fail? While age plays a role, clogged gutters are the #1 cause of rotted eaves. When debris blocks the flow of water, it spills over the back of the gutter, soaking the fascia and soffit. Over time, moisture retention leads to wood rot, which then becomes a “five-star resort” for pests like carpenter bees, wasps, and even squirrels.
If you aren’t sure if your damage has reached a critical point, you can learn how to determine if you need a soffit and fascia replacement to help decide your next move.
Essential Tools and Materials for Replacing Rotted Eaves
Before you climb that ladder, you need the right gear. Replacing rotted eaves effectively requires more than just a hammer and some nails.
Material Comparison: Which Should You Choose?
| Material | Lifespan | Maintenance | Best For |
|---|---|---|---|
| Wood | 15–20 Years | High (Painting/Sealing) | Historic homes, budget-friendly upfront |
| PVC/Vinyl | 25+ Years | Low (No rot, no paint) | Damp/shady areas, long-term durability |
| Composite | 25–50 Years | Low | High-end finishes, maximum longevity |
For the structural elements like rafters, we always recommend pressure-treated lumber. It is chemically treated to resist fungus and moisture—essential for the Utah climate.
Your Tool Checklist:
- Safety Gear: Harness, sturdy ladder, and safety glasses.
- Cutting Tools: A reciprocating saw for rough demolition and an oscillating multitool for precise, “surgical” cuts near the roofline.
- Fasteners: Use galvanized or stainless steel screws and nails. Standard steel will rust and cause “bleeding” stains on your new paint.
- Sealants: High-quality exterior caulk and wood preservative.
For a visual walkthrough on the mechanics of the boards, check out this step-by-step fascia board replacement video.
Step-by-Step Guide to Replacing Rotted Eaves Safely
Working at heights is the most dangerous part of this job. Always ensure your ladder is on stable ground, and never overreach. If you’re working on a second story, consider renting scaffolding for a more stable platform.

1. Inspection and Preparation
Start with a ground-level walkthrough. Look for peeling paint, dark stains, or sagging gutters. Once you’re on the ladder, use a screwdriver to probe the wood. If it sinks in like a sponge, it’s time for replacing rotted eaves.
2. Demolition
- Remove Gutters: Carefully detach the gutters. If they are in good shape, set them aside for reinstallation.
- Pry Shingle Mold: Use a pry bar to remove the small decorative trim (shingle mold) at the top of the fascia.
- Pull the Fascia: Remove the rotted fascia boards. If they are severely rotted, they may come off in pieces by hand.
- Drop the Soffit: Tug downward on the soffit panels to expose the rafter tails.
3. Structural Repair (Rafter Sistering)
If the tips of your rafters are rotted, you can’t just nail new fascia to them. You must “sister” them. This involves cutting away the rot and bolting a new piece of pressure-treated lumber alongside the healthy portion of the existing rafter. For more on this, see these DIY dry rot repair tips.
4. Installation and Weatherproofing
Install your new soffit first, ensuring the vents are clear. Then, attach your new fascia boards. We recommend using scarf joints (45-degree angled overlaps) where two boards meet; this sheds water much better than a simple butt joint.
Assessing the Extent of Damage Before Replacing Rotted Eaves
It is easy to underestimate rot. Often, what looks like a small surface stain is actually a “tip of the iceberg” situation. We’ve seen many Salt Lake County homes where the fascia looked okay, but the hidden rafters were nearly gone.
Use a screwdriver to check “hidden” spots:
- Behind the gutter brackets.
- Where the eave meets the house wall.
- Around any visible mold or fungus growth.
If you find that more than 25% of your eaves are soft, or if you see structural sagging, it is usually more cost-effective to replace the entire run rather than doing spot repairs. Patching small sections creates extra seams, and every seam is a potential entry point for future water damage.
Removing and Replacing Rotted Eaves Components
When cutting your replacement materials, use the old boards as templates—assuming they aren’t too crumbled to measure.
- Surgical Cuts: Use an oscillating tool to cut out only the damaged sections of the roof sheathing if necessary.
- Priming: Prime all six sides of your wood boards before you hang them. This “wraps” the wood in protection, preventing moisture from wicking in from the back side.
- Drip Line: If you are using decorative beams, ensure they are pitched 3–5 degrees away from the house to encourage drainage.
For those who prefer a professional touch, our Fascia and Soffit Installation services ensure that every component—from the drip edge to the final coat of paint—is handled with 30+ years of expertise.
Costs and Prevention: When to Call a Professional
How much does it cost to stop the rot? In the Utah market, prices can vary based on the height of your home and the materials chosen.
- DIY Costs: You might spend $6–$20 per linear foot on materials like wood or PVC, plus the cost of tools.
- Professional Costs: Typically range from $15–$30 per linear foot. A standard project might run between $460 and $1,300, though extensive structural damage can push that higher.
While DIY is tempting, we often recommend a pro for second-story work or when rafter tails are involved. Safety is the primary concern, but expertise also matters—a professional install comes with warranties that DIY work simply doesn’t. If you’re wondering who repairs soffit and fascia, a specialized gutter and exterior company is usually your best bet over a general handyman.
Long-Term Maintenance After Replacing Rotted Eaves
Once you’ve finished replacing rotted eaves, you want that work to last. Wood eaves generally last 15–20 years with maintenance, while PVC or composites can easily go 25–50 years.
Maintenance Checklist:
- Biannual Gutter Cleaning: Clean them every spring and fall. Clogged gutters are the enemy.
- Tree Trimming: Keep branches at least 3 feet away from your roofline to prevent shade-induced moisture and pest access.
- Sealant Checks: Inspect the caulk at the joints once a year.
- Paint Maintenance: If you used wood, don’t let the paint peel. Once the barrier is broken, rot begins.
For more on managing water flow, read about repairing dripping eaves.
Frequently Asked Questions about Eave Repair
Are eaves easy to replace for a DIYer?
It depends on your comfort with heights and power tools. If the rot is limited to a first-story fascia board, it is a straightforward weekend project. However, if you have to sister rafters or work 20 feet in the air, the skill level and safety risks increase significantly.
What is the difference between an eave and a soffit?
The eave is the entire overhang of the roof. The soffit is specifically the horizontal “ceiling” underneath that overhang. Think of the eave as the porch and the soffit as the porch ceiling.
When should I replace the entire roof instead of just the eaves?
If your roof is over 20 years old (approaching the end of its typical 30-year lifespan) and you have widespread eave rot, it is often cheaper to do everything at once. This allows for better integration of the drip edge and roof sheathing.
Conclusion
Replacing rotted eaves is one of the most important maintenance tasks you can perform for your home. By acting now, you protect your home’s structural integrity and prevent expensive interior water damage. Whether you decide to tackle the project yourself or hire a professional, the key is to ensure that the underlying cause—usually moisture and poor drainage—is resolved.
At M&M Gutters & Exteriors, we’ve spent over three decades helping homeowners across Salt Lake City, Davis County, and the surrounding areas protect their investments. We use advanced HOVER 3D visualization to show you exactly how your home will look with new materials before we even start.
Ready to win the war against rot? Contact us for Professional Fascia and Soffit Installation and let’s get your home back in top shape.