

Why Measuring Windows in Brick Homes is Different
Replacing windows in a brick home needs special attention. Unlike wood, brick openings are hard to change. If you make a mistake in measuring, it can lead to big problems and cost a lot of money. That’s why knowing how to measure for replacement windows in a brick home is so important.
To accurately measure for replacement windows in a brick home:
- For Width: Measure the opening at the top, middle, and bottom. Take the smallest measurement. Then, subtract 1/4 inch.
- For Height: Measure the opening at the left, middle, and right sides. Take the smallest measurement. Then, subtract 1/4 inch.
I’m Nathan Nuttall from M&M Gutters & Exteriors. With over 30 years helping Utah homeowners, our team specializes in exterior home improvements, including expert guidance on how to measure for replacement windows in a brick home. We’re here to help you get a perfect fit every time.

Measuring for replacement windows in a brick home presents unique challenges. Brick is incredibly durable but also quite unforgiving. Unlike wood frames that can be easily altered, masonry openings are difficult and expensive to resize. This means your new window must fit the existing space precisely.
The Unique Challenges of Measuring Windows in a Brick Home:
- Unforgiving Openings: Brick doesn’t flex. An inaccurate measurement means the window won’t fit, causing costly re-orders and delays.
- Mortar Irregularities: Brick and mortar can settle or become uneven over time, meaning your opening might not be perfectly square. Taking multiple measurements is crucial to account for these variations.
- Water Management: Brick is porous, so proper sealing and flashing are critical to prevent water infiltration. Measurements must account for these sealing elements without compromising the fit.
- Fragility of Brick: While durable, brick can chip or crack if too much force is applied during installation. Precise measurements minimize the need for extensive alterations.
- Securing to Framing, Not Brick: New windows must be anchored to the home’s structural wood framing, not the brick itself. This prevents damage and ensures a stable installation. Measurements must allow for this.
According to window lifespan statistics from This Old House, aluminum windows last 15-20 years, while quality wood windows can last up to 30 years. If your windows are nearing these ages, replacing them in a brick house is a proactive step to prevent future issues. If you’re seeing 11 signs you need new windows for your home, then accurate measurement is your first and most important step.
Gearing Up: Tools and Terms for the Job
Before you even think about putting a tape measure to your window, let’s make sure you have the right tools and understand the lingo. Having the right equipment and knowledge can make all the difference in getting those measurements just right.

Essential Tools
Here’s what you’ll need for this crucial task:
- Steel Tape Measure: This is your most important tool. A 25-foot (or longer) steel tape measure is ideal. Steel tapes are rigid and less prone to stretching than cloth tapes, ensuring accuracy. Watch our video How Do I Use a Tape Measure? for tips on taking accurate measurements.
- Level: A good level will help you check if your window opening is plumb (vertically straight) and level (horizontally straight). This is vital for determining if your opening is square.
- Notepad & Pencil/Pen: You’ll be taking multiple measurements for each window, so a clear way to record them is essential. A dedicated measurement worksheet can be very helpful.
- Small Pry Bar (for full-frame replacement): If you’re considering a full-frame replacement, you might need to gently remove interior trim to access the rough opening. A thin pry bar helps minimize damage.
- Safety Glasses: Always protect your eyes, especially if you’re removing old trim or dealing with potentially crumbling mortar.
Understanding Window Anatomy
To measure effectively, it helps to know the names of the key parts of a window frame:
- Jambs: These are the vertical sides of the window frame. You’ll measure between these for your width.
- Sill: This is the horizontal part at the very bottom of the window frame. It often slopes outward to shed water. You’ll measure from the high point of the sill for your height.
- Head: This is the horizontal part at the very top of the window frame.
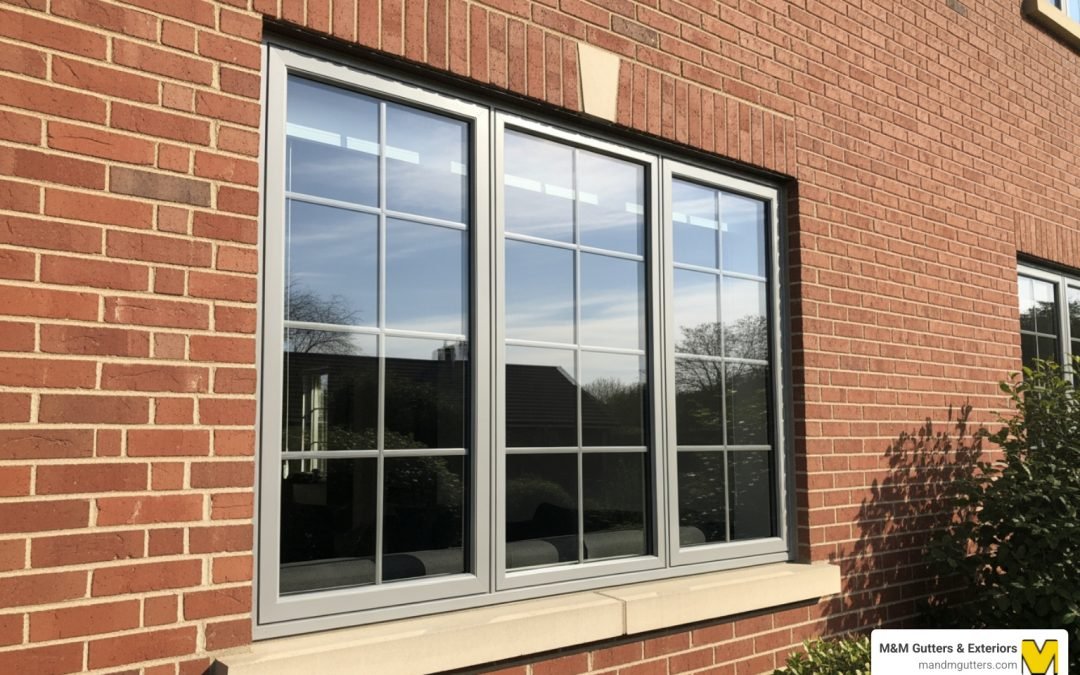
- Brickmould: This is exterior trim that frames the window, often found on brick homes. It can be decorative and helps seal the gap between the window frame and the brick opening. Its presence or absence can influence your measurement approach, especially for full-frame replacements.
The Step-by-Step Guide: How to Measure for Replacement Windows in a Brick Home
This guide details the brick-to-brick (insert) measurement method, the most common DIY approach for fitting a new window into an existing frame without disturbing the exterior brickwork.
Step 1: Measure the Window Width
Take three distinct width measurements to account for any irregularities in your brick opening.

- Measure from Inside: For a brick-to-brick (insert) installation, you’ll typically take these measurements from the interior of your home.
- Jamb-to-Jamb: Measure the distance between the side jambs of the existing window frame. Do not measure from any trim strips or parting beads, as these will be removed.
- Three Measurements: Measure the width at three points:
- Near the top of the window opening.
- At the middle of the window opening.
- Near the bottom of the window opening.
- Record Smallest Measurement: Compare these three measurements. The smallest of the three is the one you’ll use. This ensures your new window will fit even if the opening narrows slightly in one spot. Write it down clearly!
Why this matters: Brick openings are often not uniform. Using the smallest measurement guarantees the new window will fit, preventing a costly mistake.
Step 2: Measure the Window Height
Just like with the width, take multiple height measurements to ensure accuracy.
- High Point of the Sill to the Head Jamb: Measure vertically from the highest point of your existing window’s sill (where water would drain off) up to the underside of the head jamb (the top of the frame).
- Three Measurements: Take these measurements at three points:
- On the left side of the window opening.
- In the center of the window opening.
- On the right side of the window opening.
- Record Shortest Measurement: Again, compare these three measurements and select the shortest one. This accounts for any slight dips in the head jamb or rises in the sill that could affect the fit. Write it down.
Why this matters: An unlevel opening can make a window too tall. The shortest measurement ensures it will fit without being forced, allowing for proper shimming and sealing.
Step 3: Measure the Opening Depth
Measuring the depth is crucial to ensure the new window fits properly within the frame for a clean finish.
- Pocket Depth: Measure from the inside face of your interior stop (the trim that holds the window in place on the inside) to the inside face of the exterior stop (or the point where the new window’s frame will meet the exterior brickmould or trim). Ignore any pulleys or parting strips if they are present, as these will be removed.
- Minimum Depth Requirement: Most replacement windows require a minimum depth, often around 3-1/4 inches. If your opening is shallower than this, you might need a specialized window or a different installation approach.
- Measure at Multiple Points: Measure the depth at various points (left, center, right) to ensure consistency.
- Record Narrowest Measurement: Note the smallest depth measurement.
Why this matters: Insufficient depth can cause the new window to protrude, affecting trim installation and aesthetics. It also impacts the type of window frame you can choose.
Step 4: Check if the Opening is Square
Openings can shift over time, so checking for squareness is a critical step to avoid installation issues.
- Diagonal Measurements:
- Measure diagonally from the top-left corner of the opening to the bottom-right corner.
- Then, measure diagonally from the top-right corner to the bottom-left corner.
- Compare Measurements: Ideally, these two diagonal measurements should be identical.
- 1/4-inch Tolerance: For replacement windows, a difference of up to 1/4 inch between the two diagonal measurements is generally acceptable. Anything more than that means your opening is significantly out of square, and you may need professional advice on how to proceed. A window forced into an out-of-square opening can bind, operate poorly, or even fail prematurely.
Why this matters: An out-of-square opening complicates installation, can cause the window to operate improperly, and may lead to leaks. Knowing this beforehand allows for proper planning and shimming.
Step 5: Calculate Your Final Order Size
After taking your raw measurements, calculate your final order size by making a small deduction for clearance.
- Deductions for Clearance: Window manufacturers typically recommend subtracting a small amount from your smallest width and height measurements. This provides a crucial gap for shims, insulation, and proper caulking, allowing the window to be leveled and plumbed correctly within the opening without being forced.
- Standard Deduction: Based on our experience and industry best practices for brick-to-brick replacement in Utah, we recommend subtracting 1/4 inch from your smallest width measurement and 1/4 inch from your shortest height measurement.
- Example: If your smallest width was 36 1/2 inches, your order width would be 36 1/4 inches. If your shortest height was 48 3/4 inches, your order height would be 48 1/2 inches.
- Shimming Space: This small clearance allows installers to use shims to perfectly align the window within the opening, ensuring it’s plumb, level, and square, even if the rough opening isn’t.
- Expansion and Contraction: It also accounts for the natural expansion and contraction of materials due to temperature changes, especially important in Utah’s varied climate.
- Final Dimensions (Width x Height): Always provide your final dimensions in the format of Width x Height when ordering your replacement windows.
Why this matters: This deduction is non-negotiable. It leaves room for error and adjustment, which is essential for a proper, weather-tight installation.
Full-Frame vs. Brick-to-Brick: How Installation Method Affects Measurement
When replacing windows in a brick home, one of the most critical decisions is the installation method: brick-to-brick (also known as insert or pocket replacement) or full-frame replacement. This choice directly impacts how you measure and what kind of window you’ll order. We offer a variety of different window styles for your home, and the installation method will determine which ones are best for you.
| Feature | Brick-to-Brick (Insert) Replacement | Full-Frame Replacement |
|---|---|---|
| What is Removed? | Only the sashes (the moving parts) and sometimes the interior stops are removed. The existing window frame, interior trim, and exterior brickmould/trim remain intact. | The entire existing window unit is removed, including the sashes, frame, interior trim, and exterior brickmould/trim, down to the rough opening. |
| Measurement Location | Primarily from the interior of the existing window frame (jamb-to-jamb, sill-to-head). | Both interior (rough opening after old frame removal) and exterior (brick-to-brick) measurements are crucial. |
| Typical Deductions | Subtract 1/4 inch from smallest width and 1/4 inch from shortest height (for ordering the new insert unit). | Subtract 1/4 inch from the smallest exterior brick-to-brick width and height. For the interior rough opening, you’ll typically use the smallest measurement for the new frame. |
| When to Use Each | – Existing window frame is sound, plumb, and level. – Desire to preserve existing interior trim. – Budget-friendly option. – Faster, less invasive installation. |
– Existing window frame is rotten, damaged, or severely out of square. – Desire for maximum glass area (as the new frame will be thinner). – Opportunity to inspect and repair hidden damage behind the frame. – Ability to add new insulation and flashing for superior weather sealing. |
Brick-to-Brick (Insert) Replacement
This is the method we detailed in the step-by-step guide above. It’s often preferred by homeowners in Salt Lake City and surrounding areas because it’s less disruptive. You’re essentially fitting a new, pre-assembled window unit directly into your existing, structurally sound window frame.
- Measuring from the Interior: As discussed, all measurements are taken from the inside, within the existing frame. This allows you to maintain your interior and exterior trim.
- Advantages: Preserves the original character of your home, especially if you have ornate interior casing. It’s typically quicker and more economical since less demolition and finishing work are involved.
- Considerations: The new insert window will have a slightly smaller glass area because it fits inside the existing frame. This method is only suitable if your existing frame is in excellent condition – no rot, no significant warping, and reasonably square.
Full-Frame Replacement
This method is more involved but often provides a superior, longer-lasting solution, especially for older brick homes in Utah where hidden damage might be present.
- Measuring from the Exterior (Brick-to-Brick Opening): For a full-frame replacement, you’ll need to measure the actual structural opening in the brick wall.
- Exterior Brick-to-Brick Measurements: Measure the entire width of the brick opening (from brick face to brick face) at the top, middle, and bottom. Do the same for the height (from the top brick lintel to the sill brick) at the left, center, and right. Use the smallest measurements.
- Deduction: For these exterior measurements, you’ll also typically deduct 1/4 inch from both the smallest width and height to ensure the new frame can be properly seated and sealed.
- Removing Trim: To get the most accurate interior measurements, you’ll need to remove the existing interior trim and the old window frame completely. This exposes the rough opening, which is the structural opening the new full frame will sit in. Measure this rough opening similarly (width at three points, height at three points, using the smallest).
- Checking for Rot/Damage: This is a huge advantage of full-frame replacement. Once the old window and frame are removed, you (or your installer) can inspect the rough opening for any hidden rot, water damage, or structural issues. In older homes, this is often where problems are finded and addressed before they become more serious.
- Brickmould Considerations: If your home has existing brickmould, a full-frame replacement will involve removing it. Your new window may come with integrated brickmould or require new exterior trim. The exterior brick-to-brick measurement ensures the new unit, including its trim, fits cleanly within the masonry.
When to choose full-frame: If your existing window frames are soft, rotten, or severely damaged, or if you want to maximize natural light and energy efficiency, a full-frame replacement is often the best choice. It allows for a complete, fresh start with new flashing and insulation, leading to a much better long-term performance.
Common Pitfalls and When to Call a Professional
Measuring for replacement windows, especially in a brick home, isn’t just about numbers; it’s about avoiding costly mistakes. We’ve seen our share of “oops” moments over the years in Salt Lake City, and we want to help you steer clear of them.
Potential Pitfalls of Inaccurate Measurements:
- Window Too Small: This is less common but still problematic. A window that’s too small will require excessive shimming and caulking, leading to a less stable installation, poor insulation, and a less attractive finish. It may also compromise the window’s warranty.
- Window Too Large: This is the more common and frustrating issue. If your new window is too large, it simply won’t fit into the opening. This means you’ll either need to:
- Re-order: Costly delays, potential restocking fees, and wasted time.
- Alter the Opening: In a brick home, this involves cutting brick and mortar, which is a specialized and expensive job requiring a mason. It can also compromise the structural integrity and aesthetic of your wall.
- Forgetting Deductions: Not subtracting the necessary clearance (like the 1/4 inch we recommend) means the window will be too snug. It won’t allow for proper shimming, leveling, or sealing, leading to operational issues and potential air/water leaks.
- Not Checking for Square: Installing a square window into an out-of-square opening can cause the window sashes to bind, making them difficult to open and close. It can also put undue stress on the frame, leading to premature failure.
- Ignoring Rot or Water Damage: Especially with full-frame replacements, if you don’t thoroughly inspect the rough opening, you might install a beautiful new window over existing structural damage. This will lead to future problems and potentially costly repairs down the line.
- Choosing the Wrong Window Type: Trying to install a new-construction window (designed with nailing flanges for new framing) into a replacement opening in a brick home can lead to sealing and flashing issues. Always ensure you’re ordering a replacement-style window for existing openings.
When Should a Homeowner Consider Consulting a Professional?
While our guide provides a solid foundation for how to measure for replacement windows in a brick home, there are definitely times when calling in the pros is the smartest move.
- Complex Openings: If your windows aren’t standard rectangles (e.g., arches, circles, bays, or bows), measuring becomes significantly more complex. We’re experts in handling these intricate designs.
- Major Structural Issues: If you uncover extensive rot, water damage, or notice significant settling around your window openings, it’s time for a professional assessment. We can properly diagnose and address these issues before installing new windows.
- Uncertainty or Lack of Experience: If you’re feeling overwhelmed or unsure about any step of the measurement process, don’t hesitate. A botched DIY job often costs more to fix than a professional installation would have from the start. We’re here to provide peace of mind.
- Desire for Optimal Performance: Professional installers, like our team at M&M Gutters & Exteriors, have the specialized tools, techniques, and experience to ensure your windows are not only measured correctly but also installed perfectly plumb, level, and square, with superior flashing and sealing. This guarantees maximum energy efficiency and longevity.
- Warranty Concerns: Many window manufacturers’ warranties require professional installation. Relying on experts protects your investment.
Finding the right team for your window installation is crucial. If you’re searching for how to find the best window installation near me in Salt Lake City, Utah, look no further. We have the expertise to handle the unique demands of brick homes.
Frequently Asked Questions about Measuring Windows in Brick Homes
We often get questions from homeowners in Utah about the intricacies of window replacement in brick structures. Here are some of the most common ones:
Do I have to remove bricks to replace a window?
No, in most cases, you do not have to remove bricks to replace a window. This is a common misconception! Replacement windows are custom-sized to fit perfectly within your existing masonry opening. Our process involves carefully removing the old window frame and installing the new one in the same space, leaving your brickwork untouched. The only time brick cutting is necessary is if you are enlarging the opening, which is a more extensive project requiring a mason and structural modifications. Our goal is to maintain the original aesthetic and structural integrity of your brick home.
Should I measure from the inside or the outside?
This depends on the type of replacement you’re planning:
- For a simple insert (brick-to-brick) replacement: Measuring from the inside is standard. You’ll measure within the existing window frame, as the new window will slide into this space. This method preserves your interior and exterior trim.
- For a full-frame replacement: You must measure both the interior rough opening (after the old frame is removed) and the exterior brick-to-brick opening. The exterior measurements are crucial for ordering the new window unit, including its frame and any integrated brickmould, to ensure it fits cleanly within the masonry. Interior measurements help us understand the structural support and if any hidden damage needs addressing.
Our expert team typically takes both sets of measurements to ensure all variables are accounted for, providing the most accurate fit and best installation plan for your Salt Lake City home.
What if my window opening isn’t square?
It’s very common for window openings, especially in older brick homes, to be slightly out of square due to settling or construction variations over time.
- Minor Differences: If your diagonal measurements differ by up to 1/4 inch, this is generally considered acceptable for replacement windows. Our installers can use shims (small wedges) to precisely level and plumb the new window within the opening, ensuring it operates correctly and seals tightly.
- Significant Differences: If the diagonal measurements differ by more than 1/4 to 1/2 inch, the opening is significantly out of square. While adjustments can still be made, a large discrepancy may require professional intervention. In some cases, minor masonry work might be needed, or a specialized installation technique. Attempting to force a square window into a very out-of-square opening can lead to binding, air leaks, water infiltration, and even damage to the window or the surrounding brickwork. When you work with M&M Gutters & Exteriors, we’ll assess these conditions and recommend the best solution for a proper, weather-tight fit.
Get a Perfect Fit with Professional Precision
Accurate measurements are non-negotiable when it comes to replacing windows in a brick home. As we’ve explored, the unique characteristics of brick demand precision and a thorough understanding of potential irregularities. Getting it right the first time saves you from costly delays, re-orders, and potential damage to your beautiful Utah home.
While this guide provides you with detailed steps on how to measure for replacement windows in a brick home, there’s immense value in the expertise that comes with professional installation.
Benefits of Professional Installation with M&M Gutters & Exteriors:
- Peace of Mind: Our experienced team ensures every measurement is carefully taken and double-checked, accounting for all the nuances of brick construction.
- Warranty Protection: Many window manufacturers’ warranties are contingent on professional installation, protecting your investment for years to come.
- Best Expertise: With over 30 years serving Salt Lake City and surrounding areas, we understand the specific challenges and solutions for exterior remodeling in our climate, especially for brick homes. We handle everything from identifying hidden damage to ensuring superior flashing and sealing.
- Flawless Finish: We guarantee a weather-tight, energy-efficient, and aesthetically pleasing installation that improves your home’s curb appeal and comfort. Modern windows with Low-E coatings can lower utility bills by 15-25%, making them a smart investment.
For a flawless installation that protects your investment and improves your home’s beauty, explore our expert windows services. We’re dedicated to providing a one-stop solution for all your exterior needs, ensuring your home looks great and performs optimally.